Sunday, September 27, 2015

Being Responsive with Anecdotal Note Taking


Hey, hey, hey! It's Kelli from Tales of a Tenacious Teacher! I don't know about you, but I'm nose deep in all the new school year stuff I've barely found time to eat and sleep! One of my main focuses at the beginning of the year is to try to learn as much about my new group as possible. I'm trying to learn about their individual interests, families, strengths, areas of growth...... I could go on and on. How do I keep it all straight???

Anecdotal notes are a huge part of my formative assessments all year round. What are they exactly? It's a super fancy word for writing down your observations. Observations can tell you A LOT about your students for both academics and behavior. Don't believe me? Here are few reasons why I use anecdotal note-taking in my classroom:

  • They help me track things in a variety of subjects including behaviors
  • They help me be responsive to my students' needs
  • They help me to notice patterns for a particular student or groups of students
  • They provide explicit examples for discussions with my team, service members, and families
  • They help teachers stay on top of each student and not just those who are struggling for the feedback that all students (and families) crave.

What's even more awesome about this formative assessment technique is how versatile it is! You can truly test out many different ways and use what works best for you. I for one have tried many different strategies to house my notes: binders, notebooks, post-its, labels... you name it. After 4 years, I finally found my "go-to" ways of collecting these notes. Here's a few different ways I collect this important data:


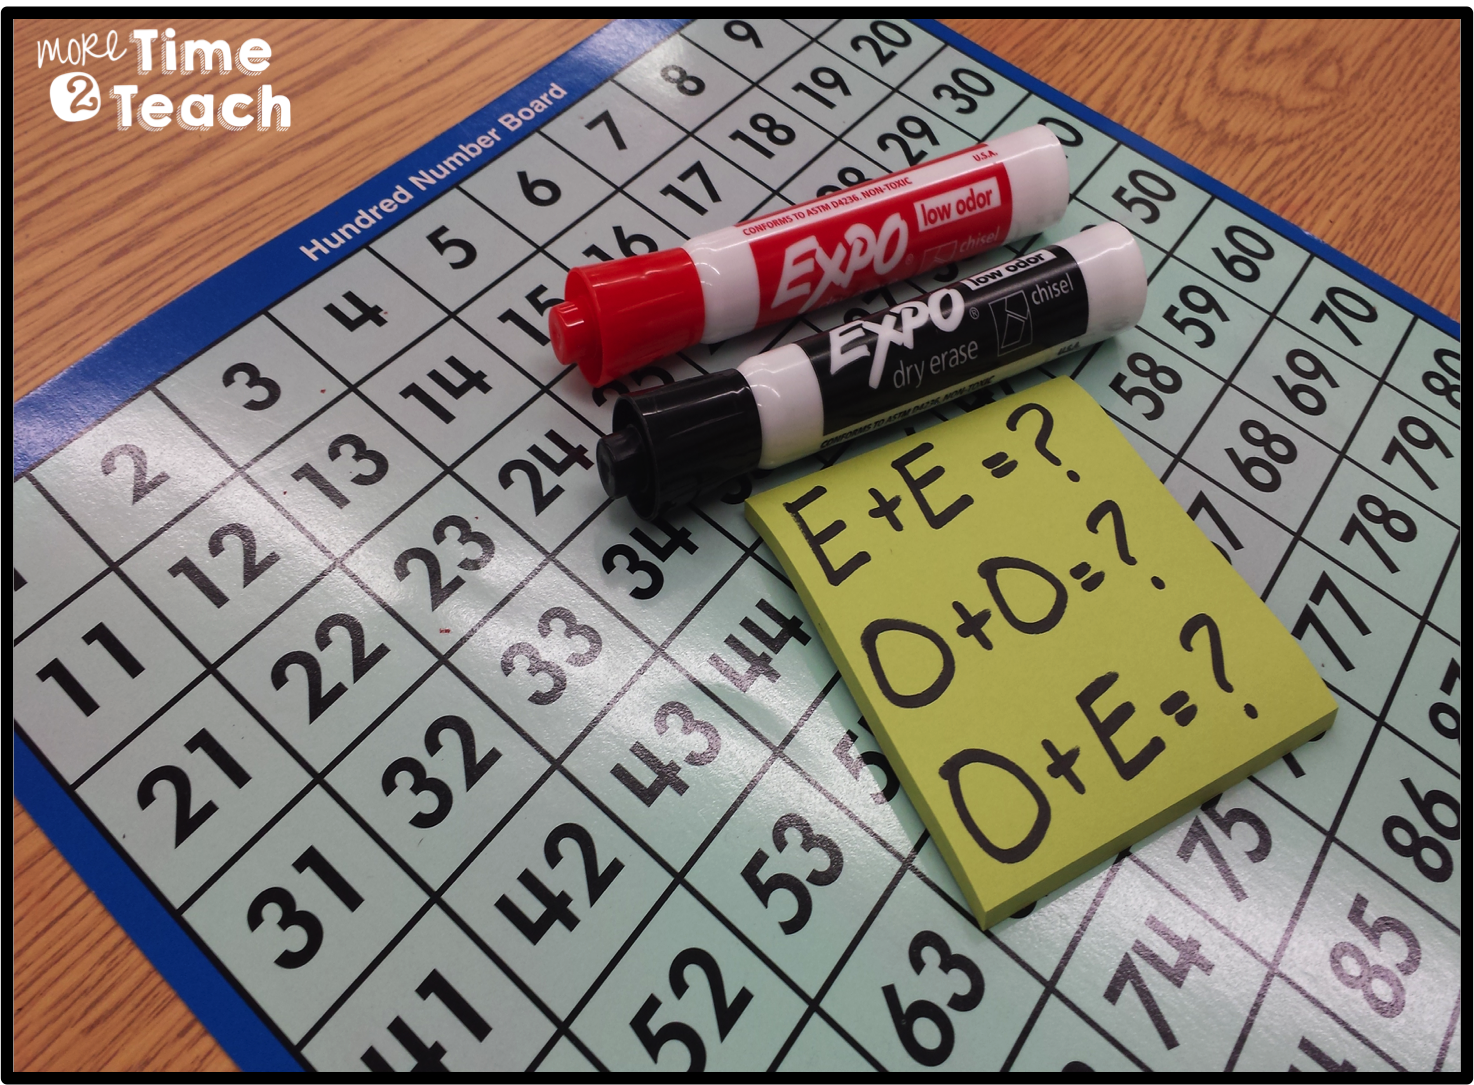
Paper & Pencil Strategy
Note-Taking Boxes

I give each of my students a number. That is one reason why I like this strategy and anecdotal note taking in general. Instead of trying to write down a student's name, I can just quickly jot their number down. It saves precious time.

How it works:
I write my focus at the top (an example template is in the cover photo). It might be an engagement inventory during reading, problems they got wrong on a math assessment, or participation during a group discussion. Then, I create a little "code" at the bottom. Usually it consists of symbols that are easy for me to jot quick and that might be repeated for more than one student. As I interact with students or scan the room, I jot down a quick note or symbol inside the student's box. This allows me to see who I have missed and lets me see everyone at a glance all at once. If I'm not writing a ton of information, this is definitely one of my favorite routes to go. I simply keep a clipboard with a bunch of these blank note taking boxes on hand so I can grab it at  moments notice and grab some information. And since I keep it all in one place on the clip board, I know where to find them for when I need them!


Apps and Technology Strategy
   Google Docs

What's cool about the note-taking boxes is I can take it digital too! I also have a blank Google Doc with the note-taking boxes and use my iPad to gather some data. I use the emoji keyboard for my symbols and since it saves my most used one, they are easy to find and tap and use for my students. I go digital with my note-taking boxes if I need to access them from multiples and don't want to bring my clip board or if I want to share them with my team, co-teacher, or service provides because it's easy to do so without loosing my original copy or having to make a paper copy. I still label them at the top (2) and just make a copy to start a new one. I add my key (2) at the bottom as a reference.


Evernote

Another app I found last year that I liked for anecdotal notes is the app Evernote. Here I can take notes based on subject. So I have my reading "notebook," writing "notebook," etc. This way, all my notes are organized by whatever I want to name it (1) in one spot that is easy to find and just like Google Docs, I can share my notes with others (2). I especially like using Evernote if I want to take pictures of student work to keep and show at our PLC or with my co-teacher. I don't love the limited formatting of the app, but I'm finding ways around it (plus I haven't fully dove in and explored it, so I'm sure I'm missing things). Both the app and computer version are helpful to take quick looks (3) of notes before opening them.


I've got my notes, now what?

Once I have my notes I do one of the following:
1. Plan strategy groups

  • Is there a group of students who would benefit from some reteaching or the teaching of another strategy? My notes allow me to look for similarities in confusion on topics we are learning about or opportunities for students to have an extension of our learning.

2. Reach out to others for support

  • "Hmmm I notice __(insert student name)__ is repeating the same work avoiding behaviors at this specific time. I wonder if my team has any suggestions on how I can help him/her be successful at this time."

3. Reflect on your teaching practices

  • "Wow- we really struggle with carrying on a conversation. I'm going to need to help scaffold this work a bit more."


How do you keep track of student performance across the school year or unit? Leave a comment below!

Friday, September 25, 2015

Working With Words


During my previous years in teaching I always noticed a lack of motivation about spelling words. My students would go through the motions, but not really want to learn the words of the week. I started to think something needed to be done. My struggling students rarely mastered the words, and the high achieving students were practicing words that were too easy. So I started looking into creating differentiated spelling. Luckily the fabulous Peppy Zesty Teacherista has a fantastic post about this very topic!!

I have the same basic idea, but I had to mash it together with what we use in our district which is Orton-Gillingham & Reading Street. The kids still choose their spelling words for the week, but I create an anchor chart that follows the rule before we start. Then we add some more words that follow the rule to the already started chart. The kids use these words for Daily 5 word study. The class is getting the hand of the routine each week. We've done this for about 5 weeks. I still have to go around the room quickly, and be sure they spelled all their words correctly. Each week there are less students that need this check, but I want you to be aware there is a learning curve for them.  After they choose 10 words that follow the rule they pick 3 high frequency words from a list they keep in their folder. I got this idea and high frequency word list from The Peppy Zesty Teacherista. It's in the post that is linked above.

So now we have words... let's work with them!

I started using Daily 5 last year and I really love it. The kids love the choice, and I love the differentiation that naturally occurs after routines have been taught. I also like how they're getting more time reading what they really love. So for Working with Words I wanted to create an inviting space with easy to use supplies. Keep it simple, but meaningful is my motto these days.
During whole class instruction I still teach the rule whether it's digraphs, blends, words with endings etc., but each students word study list is a little different. The kids have more ownership over the words and they're really proud when they've mastered a high frequency word from the list.

So here's what my word work station looks like...


My class is smaller this year so I had these extra desks that I know I'll need next year so they're being put to good use now. 


At the center is a list of options in case they forget...


Let's start with the class favorite...
SCENTED MARKERS!!!
 OhMyGoodness friends! These kids love scented markers. I mean all kids love scented markers, but this class just can't get enough. I thought the joy of them would wear down after a few weeks, but no. They love them still. They practice writing their words and later in the week try to write them without looking.


Stamps
The kids love them. Maybe it's the scented ink pad. I'm noticing a pattern...
My advice on these is be sure you buy stamps that come in an organized case and then somehow keep that set with one stamp pad. I wasn't thinking about the mixing factor when I first put them out and now my orange ink pad is more like orange with a side of grape... So learn from me! 
I now put them in a plastic supply box so it's like a kit rather than loose in the drawer.


Keyboard. 
You know those old computers that are on their way out? Keep the keyboard! Gives the kids the opportunity to get to know the keys & practice their spelling. They just type them for practice.


Magnet Letters. 
Do yourself a favor and buy the big box with the organized compartments. I put it off for so long because I didn't want to make the investment, but it's definitely worth it. The kids get much more practice time in because the letters are easy to find.


Bumpy Screens & Crayons.
The kids put the bumpy screens under their paper and write their words in crayon. Then they can remove the screen and trace their words with their finger. The sensory feedback is really helpful for students.


The best part about these materials is that I leave the same materials in the center, but the practice is different for them each week because their words are new. It's simple, yet meaningful. There is enough choice that they don't get bored either. After 5 weeks of school this is still one of the class' favorite choices, and they're getting the hang of how it should be completed.

The kids practice these words all week and then on Friday their spelling buddy gives them their test. I grade it, and if they've done well they move onto the next rule. If they need more practice they look them over for a couple more days and retake the test before moving on. Tracking it is a little more work, but they're much more engaged then they have been in past years so that makes the extra work worth it. Here's the papers students use to write their lists. It's a FREEBIE

What do you use for your spelling instruction and Working with Words Center?  


Image Map

Wednesday, September 23, 2015

4 Easy Steps for Weekly Parent Communication


Hi friends!  The last few years, our administration has required weekly communication in the form of some sort of newsletter.  As a 3rd grade teacher, I really struggled with this at firstwe really felt this was a great time for the line of communication to shift to the student being more in charge. However, in the digital age, it is time to evolve with the needs of our parents.  I’ve tried several things over the last few years. 
  • ·     Weekly emailed letters
  • ·     Weekly homework stapled in a homework book
  • ·     Printed newsletters in weekly signed papers

All are viable forms of communication, but I always wondered if my parents received it!  Add the most recent glitchour email server blocking all emails from Hotmail---I knew I needed a new solution.

Enter, one of my favorite Web 2.0 tools..PADLET!  I’ve blogged once before about how I use it with my students in my 1:1 digital classroom.  You can read about that HERE if you are interested or need more info on how to set one up.

Padlet has several features for sharing.  I’m sharing with you how to embed the Padlet on your classroom websitecreating once.  The result??  Each time  you add a newsletter, homework assignment (whatever you want to share), you will NEVER wait for ithave to update your website AGAIN!  Here’s how it works in a few simple steps.

I promise youthis is easy!  You do not need to be techy.  Seriously..copy and paste.  PROMISE!

Design your padlet.  

I really suggest using the “grid” layout.  Each time you add a padlet to the page, the most recent will automatically rise to the top.  This format also keeps them neatly arranged without any effort

Click the “Share” icon.  

Once inside, copy the text inside the Embed section.

If you have a website through Blogger, you will:


Then

Then
There it is!  By clicking on "preview", you can see how it would look on your website.  
It is ready for your parents to scroll up and down, select the newsletter to view, and even print.


On my school-hosted website, which is where I actually have this for my parents, it works a tad different.  I’m still going to find where to place the HTMLand just save it.  Mine looks like this--perhaps your school site is similar.
Onw our school site, it isn't quite a pretty as my blog, but it works for our parents to access all of the school information in one spot.
Hmm....I really need to update my picture!  Hahaha!

Last but not leastfrom now on, all you need to do is add your newsletter, parent letter, or homework to the Padlet.  It automatically updates on your website for you! 

I promised you one and DONE!  All I do now is send out a quick message on Remind to let parents know it’s there.

Now, there are no worries of the email getting lost in someone's inbox, papers being lost from school to home, and  now provide easy access to all newsletters at any time. 

There are so many possibilities doing it this way!  I hope you’ll give it a shot, friends!

Image Map

Sunday, September 20, 2015

Managing a Classroom Economy that is Super Simple!


Hello! It's Jamie from Not So Wimpy Teacher! I am excited to share some simple strategies for making a classroom economy work in your classroom.

I have used a classroom economy before and could never keep up with it. I was supposed to pay the kids and I totally forgot for weeks on end. I was supposed to sell coupons and I just never found time for the sale. After feeling terribly guilty, I would sell the cute coupons- but then the students actually wanted to use them! I didn't have time for that either! "I am sorry that you bought a show-and-tell coupon. I have 38 standards to teach today and there won't be time!" "I know you bought a lunch with the teacher coupon, but I have two meetings and photocopies to make during my 15 minute lunch." By Christmas, the economy just faded away.

This year, I rethought the entire process! I found ways to make it super simple on ME! And it doesn't take any extra time!


First, let me explain why I feel so passionate about using an economy:

  • I don't have a behavior clip chart and so I needed some way to reward students and to hold them accountable for their choices.
  • Students are more motivated when they actually get something that is tangible. Students will work harder for this piece of paper than they ever did for a clip up.
  • Students gain experience with counting money.
  • Students must make decisions about spending and saving money. This is a huge life skill!
  • Fines can be assessed privately so that students are not embarrassed. 
  • When the money comes out- my kids all turn into SUPER students! They see the reward and they will turn it up a notch! 


In previous years I paid students for classroom jobs and turning in their homework. NO MORE! I told my students that behaving, taking care of the classroom and turning in their work are things that I expect them to do. They do not get paid for these tasks. I don't want to create a classroom of students who will only do a job if they get paid. That is laziness! I don't don't get paid for making dinner, mopping the floor and paying the bills. There are tasks that everyone must do each day that they do not receive compensation for. Kids may as well learn this lesson now.

In my classroom students earn money for going ABOVE & BEYOND the expectations! Some examples include:

  • Helping classmates
  • Excellent participation
  • Compliments from other staff members or substitutes
  • Extra classwork (fast finisher activities) done in a way that shows significant effort
  • Exhibiting positive character traits
  • Explaining strategies
Since there isn't a payday in my classroom, I am able to keep up. I walk around my room with a stack of classroom money. I just drop a $1 and a compliment when I see the above and beyond behavior. Other students will hear my compliment and it will push them to work harder. 


Isn't this set of class money super cute? It comes in B&W too. My sweet friend Amber made it! You can get it HERE.

I have a really important rule in my classroom: You cannot ask for class money. If you ask for it, you won't get it. I will decide who gets the money and when. I tell students that the same task won't lead to money over and over. Additionally, I will be fair, but not every kid will be treated the same. A child who never talks will be more likely to get participation money when they speak up than the child who always offers answer. I am pushing each students to be their best possible self. Students know that asking or complaining about a difference in pay will lead to a fine.


I do not have a clip chart for negative behaviors, but I still need a way to hold students accountable. I use class fines. I always give a verbal warning, but then if a child continues to be off task, talking or disrespectful- they are fined. I decide the fine based on the offense. If you whine or complain- the fine will be doubled.

Students do not get paid to turn in their classwork and homework, but they do get fined for not turning them in! I don't get paid to make dinner, but there are consequences for not making dinner: starvation and whining children!

Last year I was having trouble with students who were losing important class papers such as math facts, centers work and spelling words. Now I am fining students who need new copies of papers! I tell them that they need to pay me for the time that it takes to make a new copy.

Finally, students accrue fines for late school library books.


Obviously a classroom economy would not be effective if the students didn't have something to spend their money on. I mean, I wouldn't care about my paycheck if I couldn't spend it all at Target! The problem I have had in the past was TIME. I started with a class store. That was pricey and hard to find the time to let kids "shop." So I decided to use coupons. Again, I didn't have time to sell them or to allow kids to redeem them. I needed a new plan...

Here are the ways that my students can spend their money:

  • Additional restroom breaks: I include this as a privilege rather than a fine. It appeases parents, but still holds kids accountable to not spend the whole day in the restroom. I am being sneaky here. Shhhh. 
  • Bring a stuffed animal to class: The animal must be small enough to sit on their desk. I always ask my students what the animal's name is and I talk to their animal during the day. They think it is funny. The best part is that it doesn't take any time. The student just hands me the money when they come into the classroom. No show-and-tell. Students understand that if the stuffed animals becomes a distraction, it will be taken away and money will not be refunded. I was surprised how many 3rd graders are still excited about this one!
  • Rent the MVP class supplies: Many teachers have a VIP basket, but I have a sports themed classroom so we have an MVP basket. I put fancy school supplies in the basket. It has smelly markers, mechanical pencils, colored pens, metallic crayons, stickers and more. Students LOVE this basket. For $5, they can rent it for the day. They just bring the money to me and grab the basket. Simple!

  • Extra treat at classroom parties: I have some sort of holiday party at least once per quarter. We always have some kind of treat at the party. Everyone gets the treat. Students can use their money to buy an additional special treat at the party. I ask parents to donate party treats so this is free for me. I am already having a crazy day- so this is a good time to offer them something to buy.

  • Extra raffle tickets for our book auctions: I do book auctions before Christmas break and before summer break. I collect books using my Scholastic bonus points and I purchase some of the $1 books. Every student receives a free auction ticket. If they wish, they can buy extra tickets so that they can increase the odds of getting their first choice book. I was already doing these auctions and so using the money doesn't not add any more work for me! You can read more about my book auctions HERE.

My suggestion to you is to think of special things that you are already doing for your students. How can you increase the fun for those who want to use the class money? Keep it simple! Kids are perfectly fine with simple! They really don't need elaborate class stores!

Friday, September 18, 2015

How to NEVER bring papers home to grade...


Okay, maybe not NEVER. But I will explain how I almost NEVER bring home papers to grade.


I grade papers right then and there. That's right! Why? My kids need that INSTANT feedback. It is what really matters to them. They want to know right then and there if they did okay. I'm more than happy to do this. If it is something I just can't grade right then, I will have it graded by the end of the day.

I teach 3rd grade. Therefore, my assessments are not lengthy. My assessments usually have 5 questions on it. Why? Because the kids either get the standard or they don't. I don't need 20 questions to tell me that. I keep it short and sweet and to the point.

Here is what it looks like when I grade....

The students come to me when they are done (they know that if there are 3 in line, they need to wait at the seat until the line is shorter)... I grade the paper right in front of them. I usually take a minute to explain misconceptions, if there are any. I have a large grid with the student's names on it. That way I can easily find their name and place the appropriate grade in the right column. I will then input the grade into my online grade book later.

I see it as a win win all around... Less paperwork at home and the kids are getting that instant feedback.


Image Map

Wednesday, September 16, 2015

Number Patterns Deserve Our Attention

Number patterns is often a topic that doesn't get much attention in the 3rd grade. We briefly go over numbers in a series and ask our students to complete the pattern.
Often times we ask them to state the rule to which many respond "counting by 2's or by 5's". However, have you ever asked one of your minions what "counting by 2's" mean or if they could explain it to you? I have and I'm embarrassed to say that most of the time I simply get the answer, "you know 2, 4, 6, 8... counting by 2's". This tells me that they don't truly understand what that means.

Patterns are more than just being able to identify which number comes next. They are found EVERYWHERE in math... Patterns are in place value, rounding, multiplication, division, fractions, and even geometry. So rightfully so they deserve our attention!
So how do we train our students to be on the constant lookout for patterns? I suggest that you start easy and early on in the year. As a matter of fact, I like to start off with my Patterns Theme Booklet and Task Cards.

This year I chose to begin my unit on patterns by having my students complete a challenging group Pattern Puzzle activity which you can grab here.
This activity was by no means easy, however, once the students began to see that this puzzle was ALL about the patterns, they began searching and finding them. Then it was just a matter of placing each puzzle piece in the right location.

I actually loved that this activity was challenging and made my 3rd graders think. They were able to experience firsthand how hard work and perseverance can lead to SUCCESS! It also gave them an opportunity to work as part of a team, practice problem solving skills, and learn what to do when their initial plan of action doesn't work.

Later on in the week we spent some time exploring and discussing the many patterns they found on their hundreds chart. (My kids absolutely loved using Expo markers to circle patterns on their chart.)

We also discovered that numbers alternate odd, even, odd, even. This led students to discover that all even numbers end in 2, 4, 6, 8, or 0.

Next, I challenged them by asking them "What happens when you add two even numbers?" I pushed them to explain their thinking by using their hundreds chart.
 After some trial and error, more patterns started arising and students started to see that an even number plus another even number equals and EVEN NUMBER. They thought this was really cool!
 What about an odd number plus another odd number? They set out to prove their thinking with their hundreds chart and table mates.
 Then a student wondered what would happen if you added an odd and an even number.  "Great question!" I answered "Why don't we find out?" And with that they were off to find out the answer.
 In the end, not only had we learned about number patterns with regards to odd and even numbers, but students had also learned the importance of testing out their thinking.
Then I really pushed them to think when I asked them to work as a group to answer the following question...
This one did take us a bit to get, but I loved watching their thought processes at work.


Thanks to our explorations with a 100's chart, a few of the things my students learned were:


  • that columns go up and down and rows from side to side
  • that traveling down a column means that you add 10 and that's why your ones digit stays the same and your tens digit increases by one
  • that when you go across a row you add 1 and that's why your tens digit stays the same and your ones digit increases by one.
  • when numbers increase (or become larger) you are adding to them
  • when numbers decrease (or become smaller) you are subtracting from them
  • that numbers alternate between even and odd
  • that even + even = even
  • that odd + odd = even
  • that even + odd = odd
Next, up.... rounding!

Image Map