Showing posts with label Love to Teach A-Latte. Show all posts

Sunday, January 31, 2016

Valentine Activity + Freebies!


Hello friends! This time of year is busy am I right!? Really all parts of the school year are busy I feel... BUT this time of year we're more than halfway through and it feels like we need to get in so much more in so little time. I always feel that way, but I still like to add a little fun into this time of year too. So here's a QUICK and SIMPLE valentine for the kids to create & one that you can create for them!


"Thumb-body loves you!"  Get it!? Haha! A little cheesy I know, but so cute! I saw this somewhere, but I'm unsure of who came up with the original idea. If you know post it in the comments I always like to give the credit where it's due!
This short little activity ended up being so much fun for the kids last year! I just had the kids glue the white paper onto folded color construction paper. Then they came up to the table, put their thumb on an ink pad, and down on the paper. Back at their desks they decorated with markers and wrote a message on the inside. Simple, quick, and cute! Here's the link to the FREEBIE if you'd like to use it!


I gave these valentines out last year and they were perfect! Simple, easy to put together, and the kids needed a new highlighter by this time in the school year #wheredothesuppliesgo ? I updated mine from last year to create an even cuter version for you! I hope you can use it! Most of all I hope you enjoy this LOVEly time of year!
Happy Valentine's Day Friends!!
Know you're making a different each day in that classroom of yours!

Image Map

Wednesday, November 25, 2015

4 Tips for Teaching Multiplication


If you're a 3rd grade teacher you know the importance of teaching multiplication. Here are some tips I've found helpful to teach this super important skill.


Teach Them The "Tricks"
*x2 facts are just like your addition doubles facts
If I know 4 +4 =8 I know 4 x 2 = 8

*Use your x2 to get to your x3 facts.
2x4=8  so 3x4= 8 +4=12

*Double your x2 products to find the x4 products. 
I know 6 x 2 = 12. If I double the product I find the x4 product. 12 + 12=24 so 6 x 4 = 24

*Double your x4 products to find the x8 products.
I know 4 x 6=24. If I double 24 I find the product of 8 x 6. 24 + 24=48 so 8 x 6 = 48

*Double your x3 products to find your x6 products.
I know 3 x 7= 21. If I double 21 I find the product for 6 x 7. 21 + 21=42 so 6 x 7 = 42.

*Nines Trick
Look at the factor being multiplied by 9 and think "What is one less?" That's your tens digit.
 Then think "What number do I add to the first number to get a sum of 9?"
Example: 9 x 6
5 is one less than 6. 5 + 4 = 9. So the answer is 54.


Teach & Discuss the Properties
I took a lot of time to teach and ensure understanding of the Commutative, Associative, and Distributive Properties. We completed a few interactive notebook pages to learn and show the meaning. 

Then we talked about them A LOT as we solved. It's really helping them explain their strategies for solving, and giving them options for those challenging facts.


Model How To Use The "Tricks" and Properties
I'm lucky enough to have access to a document camera and it has helped so much! I'm able to better model and talk through how I solve, which in turn helps them form their understanding. I model A LOT. The kids also model how they solve. Letting them lead and explain themselves helps them increase their understanding. It also helps their peers that struggle. Sometimes hearing it from someone your age makes it click!


The students are always so proud when they can correctly explain how they solved to their peers. It's a huge confidence builder and it's fun!! 


Give Kids Time to Practice
Let them practice their facts with games, apps, stations, and printables


A great & easy game to implement is called Salute. You need a deck of cards. Use only numbers 1-9, and I suggest starting with just 1-5 at first.  The kids are in groups of 3. The captain says "salute". The two other players put a card on their forehead without looking. The captain says the product of the 2 cards on their foreheads. By looking at the other player's card & knowing the product the players need to figure out what factor is on their forehead. 
The first person to say the correct number on their forehead gets the cards. 
For example: The captain says the product is 12 and I can see that my opponent has a 4 on his forehead. I know 4 x 3 = 12 so I have a 3 on my forehead. "Three!"

Allowing kids time to apply the skills you've taught them is so important. A lot of times we have so many standards to take care of in a year we forget about this very important step.
 This is the step that I'm working to improve right now.

Do you have any great multiplication resources that you've used & seen great success? 
Share them in the comments below! 


Image Map

Friday, September 25, 2015

Working With Words


During my previous years in teaching I always noticed a lack of motivation about spelling words. My students would go through the motions, but not really want to learn the words of the week. I started to think something needed to be done. My struggling students rarely mastered the words, and the high achieving students were practicing words that were too easy. So I started looking into creating differentiated spelling. Luckily the fabulous Peppy Zesty Teacherista has a fantastic post about this very topic!!

I have the same basic idea, but I had to mash it together with what we use in our district which is Orton-Gillingham & Reading Street. The kids still choose their spelling words for the week, but I create an anchor chart that follows the rule before we start. Then we add some more words that follow the rule to the already started chart. The kids use these words for Daily 5 word study. The class is getting the hand of the routine each week. We've done this for about 5 weeks. I still have to go around the room quickly, and be sure they spelled all their words correctly. Each week there are less students that need this check, but I want you to be aware there is a learning curve for them.  After they choose 10 words that follow the rule they pick 3 high frequency words from a list they keep in their folder. I got this idea and high frequency word list from The Peppy Zesty Teacherista. It's in the post that is linked above.

So now we have words... let's work with them!

I started using Daily 5 last year and I really love it. The kids love the choice, and I love the differentiation that naturally occurs after routines have been taught. I also like how they're getting more time reading what they really love. So for Working with Words I wanted to create an inviting space with easy to use supplies. Keep it simple, but meaningful is my motto these days.
During whole class instruction I still teach the rule whether it's digraphs, blends, words with endings etc., but each students word study list is a little different. The kids have more ownership over the words and they're really proud when they've mastered a high frequency word from the list.

So here's what my word work station looks like...


My class is smaller this year so I had these extra desks that I know I'll need next year so they're being put to good use now. 


At the center is a list of options in case they forget...


Let's start with the class favorite...
SCENTED MARKERS!!!
 OhMyGoodness friends! These kids love scented markers. I mean all kids love scented markers, but this class just can't get enough. I thought the joy of them would wear down after a few weeks, but no. They love them still. They practice writing their words and later in the week try to write them without looking.


Stamps
The kids love them. Maybe it's the scented ink pad. I'm noticing a pattern...
My advice on these is be sure you buy stamps that come in an organized case and then somehow keep that set with one stamp pad. I wasn't thinking about the mixing factor when I first put them out and now my orange ink pad is more like orange with a side of grape... So learn from me! 
I now put them in a plastic supply box so it's like a kit rather than loose in the drawer.


Keyboard. 
You know those old computers that are on their way out? Keep the keyboard! Gives the kids the opportunity to get to know the keys & practice their spelling. They just type them for practice.


Magnet Letters. 
Do yourself a favor and buy the big box with the organized compartments. I put it off for so long because I didn't want to make the investment, but it's definitely worth it. The kids get much more practice time in because the letters are easy to find.


Bumpy Screens & Crayons.
The kids put the bumpy screens under their paper and write their words in crayon. Then they can remove the screen and trace their words with their finger. The sensory feedback is really helpful for students.


The best part about these materials is that I leave the same materials in the center, but the practice is different for them each week because their words are new. It's simple, yet meaningful. There is enough choice that they don't get bored either. After 5 weeks of school this is still one of the class' favorite choices, and they're getting the hang of how it should be completed.

The kids practice these words all week and then on Friday their spelling buddy gives them their test. I grade it, and if they've done well they move onto the next rule. If they need more practice they look them over for a couple more days and retake the test before moving on. Tracking it is a little more work, but they're much more engaged then they have been in past years so that makes the extra work worth it. Here's the papers students use to write their lists. It's a FREEBIE

What do you use for your spelling instruction and Working with Words Center?  


Image Map

Saturday, July 25, 2015

Read Alouds That Help You Teach 3rd Grade Skills


I always enjoy introducing a topic using a book. If it's the right book it can hook the kids immediately & honestly I really enjoy reading a great book out loud. It always makes me feel really connected to the class and I always walk away from it feeling joyful. I think that has a lot to do with how the kids respond too. If I like the book, it shows and they tend to enjoy it more when it seems I'm enjoying it. Some of my favorite memories are of us reading a book together as s class.
Here are just a few from this past year that caused fantastic class conversations and student "Ah-ha" moments...


Exclamation Mark
I read this one near the beginning of the year and it helped us review ending punctuation. This book is SO MUCH fun to read. The kids & I just laugh when the question mark shows up. Ha! I actually read this one a few times this year because we loved it so much & the extra exposure helped students that struggle pick up on the humor if they didn't understand it the first time.


Duck. Rabbit!
It's a Duck! No, It's a Rabbit! Haha! The kids were all talking during this read aloud that helped us to understand Point of View. I also was able to link this one to opinion writing & persuasive statements. After we read a few pages I stopped and had them jot down a couple reasons that supported their opinion of duck or rabbit. They shared those ideas with a neighbor to help them see their point of view and maybe even persuade their neighbor to change their mind. There were so many great conversations happening during this one. We read this one more than once as well to remind the kids of the skills learned.


Who Would Win? Lobster vs. Crab
This series is AMAZING! If you don't have these in your classroom library they are a must for your Scholastic wish list this year. The kids absolutely devoured these once I read one out loud. I had to require that they only keep 1 in their book box so others in the class could read them! This is the kind of problem I want to have in my classrooms always!
I used these books to teach opinion writing and persuasive statements. The kids would have a pencil and paper as I read the fact pages about each animal. When I do this I only read the fact pages that really help support their opinions so be sure you read through the book first and plan which  pages you'll read. They would jot down notes about each creature and naturally conversations began to occur. "The lobster will win because..." and "That trait will help the crab in a fight".  Now at the end of these books there is a "fight scene" between the two creatures and one ends up the "winner".  I stop just before the fight scene and we complete the following activity...
We would review how to write a strong opinion paragraph. Then using the facts they jotted down they wrote who they thought would win and why.  After everyone had created their paragraph I would read the end. When I read the endings they were on the edge of their seats people! You could hear a pin drop in my class & then when it's finally over TONS of conversation about their opinions would occur. Now I know this sounds like chaos, but if you listen closely you hear them sharing text evidence about why the ending has to be wrong or right. I had one student this past year who read the bull shark version with a partner and he was so adamant that the ending was wrong that he was referencing other books. It was great and also convincing. After hearing his evidence I even thought there might be a misprint in the book. I even encouraged him to write a letter to the author. :)  He was engaged, reading, researching, and thinking! It doesn't get much better than that does it!?


Amelia Bedelia 4 Mayor
Oh Amelia! This lady is always doing the craziest stuff! At first I thought these would be too childish, but really when you read Amelia Bedelia it takes a lot of word knowledge to fully understand the humor in her books. So I gave it a try this year to teach homonyms and figurative language. When I read these out loud it was a slow read in a way. Meaning, I had to pause a lot because there was so much humor they were missing. This book ended up taking us 3 read aloud sessions because we took the time to understand what was really happening in small sessions. I also had the class say whether it was figurative language or a confused homonym when we came across those classic "Amelia Moments". After reading this out loud the kids started picking these up on their own and pointing out confused homonyms to me or a neighbor. Success!

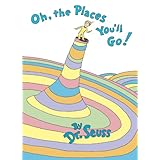
Oh The Places You'll Go!
I LOVE this book. It might be my all time favorite picture book after this year. It may have been the first time I read it and the kids really understood it. I used this book to teach figurative language this past year. I wrote some of the figurative phrases on a chart paper. As we read we paused and the students made sense of them together. Then we wrote what the phrase meant in kid friendly language next to the figurative phrase. I felt so proud of them after this lesson. Figurative language is so hard to understand and they really worked together & thought hard about each page. They walked away from the carpet feeling like they could do anything!

Books can connect our kids to so many concepts & it's important for us to remember how much our older elementary students enjoy hearing a story.
What are your go-to books to read out loud & teach skills?

Image Map

Wednesday, July 1, 2015

Summer Reading: Fun For Teachers Too!


Hello Friends! I hope you all are are having a refreshing & fantastic summer break!
This is the time of year I spend major time with family and read A LOT!
There just never seems to be enough time during the school year to read those books you actually want to read. 
Now that I'm teaching 3rd grade I have to read a bunch of books within their range & interest levels. I find that the more I talk about books I've read the more the kids pick them up. Do you notice that in your classroom too? One part of 3rd grade I absolutely LOVE is how much more the kids talk about what they're reading. 
At the end of the school year we took the time to talk about the books we had read and thought other people might like. Each student had a list where they could jot down some books he/she might want to read over the summer. I even had a list!

We met with different people in our classroom and by the end everyone had a least a few titles on their lists. I really enjoyed hearing what the kids had to say as I moved from group to group.  
My list became really long actually...

So this summer my goal was to read more. Then in the fall I'll have more books to talk about with the kids. Here's what I've been reading...


At first I was very unsure about the I Survived series. I'm very primary-minded and I thought these would be too scary for kids. The boys in my class were raving about the series. "You have to read these books!" So I've kept an open mind and I've been working my way through them. These books are great for kids who love history, suspense, and a strong main character. The author, Laura Tarshis, does a nice job of placing the character in the historical event. You feel like you're there with all the detailed descriptions. However, the story is true to history so it does have scary and violent events. I've had students tell me that the book about sharks has a scene that is really scary, so I'm saving that title until after I return from my beach vacation. Ha!
Tarshis stays true to the events of the day and the main character always survives. Hence, the title of the series. The part of the books I like the most is at the end where she gives all these great facts about the historical event. I've learned new facts in each of the books.
You could use this series to teach character traits, problem & solution, details about setting, and obviously history. You could also read two books that you're comfortable with and teach compare & contrast of books in a series. Hurricane Katrina & The San Francisco Earthquake would be a good pairing in my opinion. 
***Note: You need to read these before you jump right in. You know your students and if they'll be comfortable reading books with this type of content.***


Frindle is just fantastic! I know many of you have probably read it, but I never had and I'm so glad I did. If you haven't read it here's a little background. No spoilers! 
The main character Nick decides to make up a new word after learning a thing or two from a challenging teacher. It's all about being an original thinker and how success is created through perseverance. The ending is so good!
You could use this book to teach character traits, new vocabulary, and making inferences.


The One & Only Ivan is by far my favorite book. I actually read this one in the spring, but it was amazing. Everyone always suggested it and after reading it I became one of those people. 
A very basic description is it's about a gorilla and elephant in captivity.
Katherine Applegate does a fantastic job of helping you identify with her characters. It's definitely an emotional book. I cried and laughed and then cried again. When I finished it I was happy, sad, and inspired. The biggest lesson I took from the book was that people can make big things happen. 
You could use this book to teach point of view, character traits, problem & solution, new vocabulary, and moral of a story. You could also link it to research of gorillas & elephants. You could get library books and allow the kids to research either animal and then write a paragraph or create a poster about that animal. 


Learn Like a Pirate by Paul Solarz was for my own professional development. I'm still reading it, but so far it has been an eye-opener. It's all about empowering your students and how that empowerment can create independent, motivate learners. There are so many great ideas in this books to create a student-led classroom. From what I've read the results of this type of environment are many. If you'd like to read more please stop over at my blog and click on the Learn Like a Pirate tab.


This is my unfinished stack.... 
It seems to be growing, but we're never really "done" as teachers so I'm alright with it. :)
What have you been reading!? What should I add to my list!? 
Image Map

Tuesday, May 26, 2015

A Little Classroom Library Makeover!


Hello friends! It's Kelly from Love  to Teach A-Latte!
Do you have one of those projects you never got around to this year!? You know the project I'm talking about... the one you wanted to get done but just weren't sure how you wanted to take care of it? Then all of the sudden it's May and that project still isn't done! No!? Just me!? Well friends I finally got mine done! After a LOT of thinking, and talking with my students the actual project was pretty quick. I took care of it in a productive early morning! Whew!

All year I've been thinking about how to organize my classroom library. This was my first year in 3rd grade and I was really unsure how to change it up. I didn't think there would be a huge difference between a 2nd & 3rd grade classroom library, but I was wrong! Third graders grow so much as readers. They aren't as interested in those picture books that the second graders treasure. They want the newest and best chapter books. I had to make some big investments in books this year. Thank goodness for the Scholastic Warehouse sales! With my new books came a space problem and the kids were struggling to find what they wanted to read. Also many students didn't know what was available.

So here's where I started...


I had the picture books in color coded boxes. See the labels!?  However the deep baskets made it so hard to look through the books, and I was having an overflow problem as you can see...


Is this color orange, red, brown? Who knows!? What I do know is it needs an update!


The first step for me was to clean the shelves and then make the shelves more inviting. 
Solution: chevron contact paper! I LOVE this stuff!


You know that saying, "Measure twice, cut once"? Be sure to do that! The first shelf I finished had contact paper that was an inch short. Womp! Womp! So learn from me, measure twice & cut once!

The next big step is to peel back a small amount of the back corner and line it up well. Get the end of the contact paper lined up with the back & side of the shelf so as you peel it continues to spread out in a straight line. 
I peeled it SLOWLY as I went along, and I recommend you try it that way too. You can smooth it out as you go more easily and you're not dealing with a huge sticky piece of contact paper. Smoothing it out in small sections helped me because it created less of those air bubbles too. 
I covered 4 shelves that were about 48 inches long and used 2 rolls of contact paper. 


I know the color isn't completely gone, but this update has made a huge difference! It's MUCH easier than painting (I've tried that) and it's chevron! Who doesn't love chevron!?
I was a little bit excited about it! The kids came in just after I finished, and I was beaming!
"Look guys! Look at the library!"
#onlyteachersunderstand
The kids love the update too! They were excited to see the new set up later during book shopping.

 In order to accomplish this I had to pack away MANY picture books that I know the kids don't read often. I added many new chapter books from series that I know the kids enjoy, and I organized the shelves.
Here's what it looks like now...


The top shelf is in alphabetical order by series. The bottom shelf is random chapter books in order by title, and all the mystery books are in the blue box. I want to add some separation to each series with maybe a laminated strip of thick card stock & a label. That will be my summer project.


These boxes are from Lakeshore. The books are separated by category. Some of my categories are, animals, space & weather, poetry, and then a couple with our favorite characters. The bottom shelf has our dictionaries, and some supplies for Working With Words.
I'll have some fun making these labels too. 


This spindle, which I rescued from the recycle bin, has all my Magic Tree House, Ready Freddy, Who Would Win, and other non-fiction readers that the kids just love. This sits on top of the shelf.


It's amazing what a little contact paper & a lot of thought can do.
I hope you get one of your projects done before a well deserved break friends!!!

Image Map

Saturday, April 25, 2015

Monthly Math Stations


Hello Friends! I'm Kelly from Love to Teach A-Latte! I have been teaching for 10 years. The majority of my years have been in 2nd grade and this year I learned about the amazing world of 3rd grade! I teach in Ohio, which is where I live with my fabulous husband, adorable son, and lovable Labrador. In my free time like to read, create, inspire, and be outside. I look forward to interacting with all of you!

Today I'm sharing how I organize math stations in my classroom. It took some trial and error, but I finally found a routine that works for me. When I first started implementing Guided Math I tried to switch the math stations weekly and I felt like the minute my students understood how to complete the activity I was changing it! Yikes! I found that placing open-ended activities in the station boxes for one month helped me and the students! I placed better quality stations and they're practice was much more meaningful.  It was a win-win situation! I love it when that happens!

I choose and create my stations very carefully. The key is the stations must be open-ended. This means students can go to this station many times in a month and the practice is never quite the same. This can be accomplished by implementing tasks that have more than one correct answer. For example,"Use three magnet numbers and math symbols to create an equation that equals 20. Then let your partner check it."


In my classroom we use many task cards, magnetic numbers, dice activities, games, and other math manipulatives that help the students practice the math skills they've already learned. In the picture above you can see some of the math supply drawers so students can help themselves. This fosters independence and is one less supply they might have to ask about. They can also put away a supply that has been accidentally left out.


 Above you'll see my station boxes. I have 12 in all. The green ones are from Wal-Mart.  Later in the year I needed more boxes and of course they were all gone so I had to get a few blue ones. Luckily both of these colors go with the theme in my room so it still looks good! Whew! They're the perfect size to fit the materials, and they fit nicely on a book shelf for storage.


On the inside of each box is a sheet that explains how to complete the station. It also contains the supplies needed to complete the station.  Below is an example of how the station box looks before the kids use it. Ha! I'm kidding... mostly....


We worked very hard at the beginning of the year. We learned how to behave & organize the stations. We practiced taking them out, talking to our buddy in quiet voices, and putting the station away. However, they're kids so sometimes they need reminding. Overall they've done a great job keeping the stations orderly and using the station time properly this year.  At the beginning of the year we also talked a lot about not interrupting the teacher's math group and they learned to ask other students if they had questions during the rotation. It took practice, but they really understood the routine after all of the practice. I also have the expectations posted on our bulletin board in case they need a reminder OR a substitute is in our classroom. I got these expectation ideas from The Daily 3.


Here are some more supplies I couldn't live without in my math stations and guided math group lessons. The fraction tiles have helped immensely with teaching fractions on a number line. A good set of magnet numbers, and Judy clocks are totally worth the investment in my opinion. I also love using the rain stick for transitions. I got this idea from The Daily 5.


So here is what a math block would look like...
I would complete a short whole class lesson on a topic. After the lesson I call a math group to my table. Then half the class does seat work, while the other half meets with their assigned math buddies to complete a station. Students' names are on a small pocket chart next to their math  buddies. Half the chart is blue & half is green so they know if they're supposed to be completing seat work or a station. The students completing seat work are completing the activity independently, and then they must review the seat work with their math buddies. After checking they can move to stations.
Students in stations...
One member of the station group is the "Go-Getter". They choose the station for the group. The other members of the group pick their spot to practice. This helps avoid the big traffic jam at the station shelf. The Go-Getter brings the station to the group members. They read the directions and complete the station together.
During this time I'm working with a math group at their level. 1 rotation lasts about 15 minutes. I use the rain stick to alert the class we're switching and the students clean up their station.
At this point I'll either continue with another math group or have another short whole class lesson.
When we begin another rotation I'll call the group. Children completing seat work should be able to move into stations, and those students who were completing stations will complete seat work. I can get in 4 math groups on a smooth day and 3 math groups on a rocky day. I sure you know what I mean. :)

This is what works for me! I hope you learned a trick or two! What works for you?
Next year I want to implement more writing about math into our station time. What would you like to change about your math block? Let's brainstorm together!


Image Map